Author Archives: luther

samsung un32eh4003f manual

Category : Manuals

Welcome to the Samsung UN32EH4003F manual, your comprehensive guide to understanding and optimizing your LED TV experience․ This manual covers setup, picture customization, sound settings, troubleshooting, and maintenance tips to ensure you get the most out of your device․ Designed to be user-friendly, it helps you navigate features, resolve common issues, and enjoy enhanced viewing experiences․ Explore detailed instructions and expert recommendations for maximizing your TV’s performance and longevity․

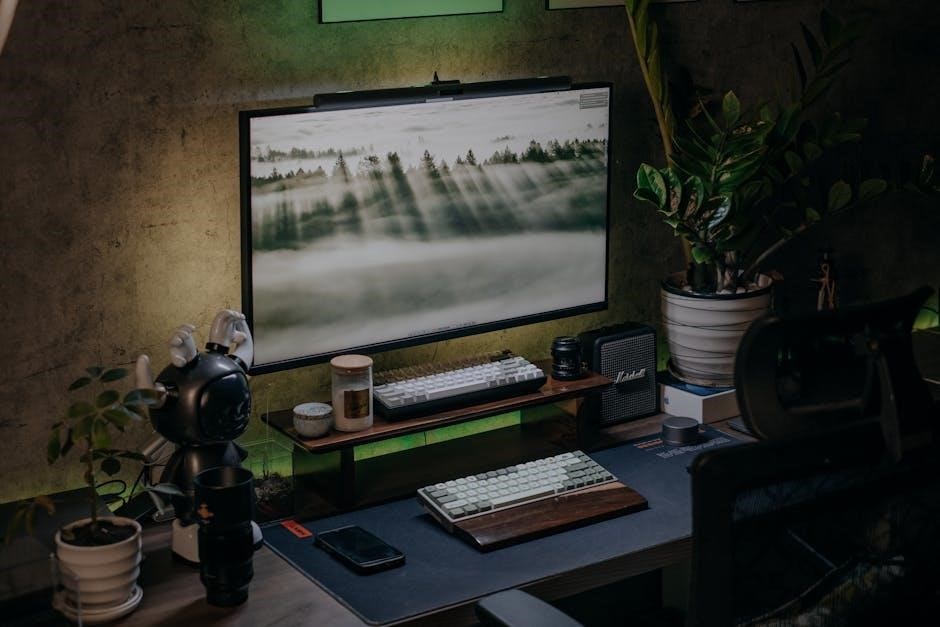
Overview of the Samsung UN32EH4003F LED TV

The Samsung UN32EH4003F is a 32-inch LED TV designed for crisp HD viewing experiences․ It features a sleek design, multiple HDMI ports, and USB connectivity for seamless device integration․ With energy-efficient technology, it balances performance and power savings․ The TV offers a user-friendly interface, making it ideal for everyday entertainment․ Its compact size and reliable performance make it a great choice for smaller spaces, ensuring vibrant visuals and clear sound quality․

Importance of Reading the Manual

Reading the Samsung UN32EH4003F manual is essential for understanding its features, optimizing settings, and troubleshooting common issues․ It provides detailed instructions for setup, customization, and maintenance, ensuring you maximize your TV’s performance․ The manual also includes safety precautions, warranty information, and tips for enhancing your viewing experience․ By following the guide, you can avoid potential damage and make informed decisions about your TV’s configuration and care․

Getting Started with the Samsung UN32EH4003F

Unboxing, connecting cables, and powering on your TV are the first steps․ Use the remote to navigate initial setup, including language selection and channel tuning for a seamless experience․

Unboxing and Initial Setup

Begin by carefully unboxing your Samsung UN32EH4003F, ensuring all components are included․ Place the TV on a stable surface or mount it according to the provided instructions․ Connect the power cord and any external devices like sound systems or gaming consoles․ Finally, power on the TV and follow the on-screen prompts to complete the initial setup, including language selection, channel tuning, and connectivity configuration for a smooth start․

Understanding the Remote Control

Familiarize yourself with the Samsung UN32EH4003F remote control, featuring essential buttons for navigation, volume control, and channel selection․ Key functions include the power button, menu access, and shortcuts for settings․ Use the directional pad to navigate menus effortlessly․ Programmable buttons allow customization for frequently used functions․ Ensure batteries are inserted correctly for optimal performance, and refer to the manual for detailed button layouts and advanced control options to enhance your viewing experience․

First-Time TV Setup and Configuration

Begin by turning on your Samsung UN32EH4003F TV and following the on-screen prompts for initial setup․ Select your preferred language and country settings․ Connect to your preferred input source and configure basic settings like display and sound․ Use the remote control to navigate through menus and customize preferences․ Ensure all external devices are properly connected and test their functionality to ensure a seamless viewing experience from the start․

Connections and Compatibility

The Samsung UN32EH4003F features multiple HDMI ports, USB inputs, and audio output options for seamless connectivity with gaming consoles, sound systems, and external devices, ensuring compatibility and convenience․

Available Ports and Connectivity Options

The Samsung UN32EH4003F is equipped with multiple HDMI ports for connecting devices like Blu-ray players and gaming consoles․ It also features USB ports for media playback and an optical audio output for enhanced sound systems․ Additionally, it supports wireless connectivity options, ensuring seamless integration with external devices and providing a versatile entertainment experience for users․

Connecting External Devices (Gaming Consoles, Sound Systems, etc․)

To connect external devices to your Samsung UN32EH4003F, start by identifying the available ports․ Use HDMI ports for gaming consoles and Blu-ray players, ensuring compatibility with the latest standards for optimal performance․ Connect sound systems via the optical audio output using an optical cable for enhanced sound quality․ USB ports allow media playback from external drives․ For wireless options, check if your TV supports Bluetooth for connecting headphones or speakers․ Refer to the manual for setup instructions and ensure proper placement of devices for the best experience․ Carefully follow the steps to configure settings and enjoy seamless connectivity․

Navigating the TV’s Menu System

Use the remote control to access the main menu, featuring options like Picture, Sound, and Settings․ Navigate through categories using arrow keys and customize preferences for enhanced viewing experiences easily․

Main Menu Options and Features

The Samsung UN32EH4003F main menu offers a variety of options to enhance your viewing experience․ Access Picture Settings to adjust brightness, contrast, and color balance․ The Sound Menu allows customization of audio modes and equalizer settings․ Explore the Channel Menu for channel management and the Setup Menu for system configurations, such as language and time settings․ Navigate easily using the remote control for a personalized experience․

Customizing Settings for Optimal Viewing Experience

Customize your Samsung UN32EH4003F TV settings to enhance picture and sound quality․ Adjust picture modes like Standard, Movie, or Dynamic to suit your content․ Fine-tune color balance, brightness, and contrast for vivid visuals․ Enable features like Motion Interpolation for smoother motion or Dynamic Contrast for better details․ Explore audio settings to optimize sound for movies, sports, or music, ensuring an immersive experience tailored to your preferences․

Picture Settings and Adjustments

Optimize your viewing experience with the Samsung UN32EH4003F’s picture settings․ Adjust modes, color balance, and contrast for vibrant visuals․ Reduce eye strain with optimal brightness settings․

Understanding Different Picture Modes

The Samsung UN32EH4003F offers various picture modes like Dynamic, Natural, and Movie․ Dynamic enhances brightness and colors, ideal for vibrant visuals․ Natural provides balanced settings, while Movie optimizes for cinematic experiences․ Each mode tailors display settings to match content type, ensuring an immersive viewing experience tailored to your preferences and the type of media you’re enjoying․ Explore these modes to find your perfect setting․

Calibrating the Display for Better Image Quality

Calibrating your Samsung UN32EH4003F’s display ensures optimal picture quality․ Adjust brightness, contrast, and color balance to suit your viewing environment․ Use the TV’s built-in calibration tools to fine-tune settings for natural colors and clarity․ Proper calibration enhances sharpness, reduces eye strain, and ensures content appears as intended․ Refer to the manual for detailed guidance on achieving the best visual performance tailored to your preferences․

Sound Settings and Audio Configuration

Adjust sound modes like Standard, Movie, or Music to enhance audio quality․ Connect external speakers or soundbars via HDMI or optical ports for a richer experience․

Adjusting Sound Modes for Different Content

Optimize your audio experience by selecting predefined sound modes․ For movies, choose “Movie” mode to enhance dialogue clarity and bass․ Switch to “Music” mode for balanced audio reproduction․ Sports mode amplifies crowd sounds, while “Standard” mode suits everyday viewing; Each mode tailors settings like equalization and surround effects, ensuring the best audio quality for any content type․ Experiment to find your perfect sound․

Connecting External Audio Devices

Enhance your TV’s audio by connecting external devices like soundbars or home theaters․ Locate the audio output ports on the TV’s back, such as optical or HDMI ARC․ Use an appropriate cable to link the TV to your audio system․ Navigate to the TV’s menu, select the correct audio output, and enjoy immersive sound tailored to your entertainment setup․ Ensure compatibility and proper configuration for optimal performance․

Troubleshooting Common Issues

Resolve connectivity or picture distortion issues by restarting the TV, checking cable connections, or updating software․ Ensure proper signal input and verify settings for optimal performance and clarity․

Resolving Connectivity Problems

Ensure all cables are securely connected to the correct ports․ Restart the TV and external devices to reset connections․ Check for loose wires or damaged cables․ Verify input selection matches the connected device․ Update TV software for compatibility․ Consult the manual for port configurations or contact Samsung support for further assistance if issues persist․

Addressing Picture or Sound Distortion

Check all connections and ensure cables are secure․ Restart the TV and connected devices․ Adjust picture settings to default or calibrate manually․ For sound issues, verify audio modes and external device connections․ If distortion persists, reset the TV to factory settings or update software․ Refer to the manual for detailed calibration steps or contact Samsung support for assistance․

Maintenance and Care

Regularly clean the screen with a soft cloth and avoid harsh chemicals․ Update software periodically for optimal performance․ Ensure proper ventilation and avoid extreme temperatures for longevity․

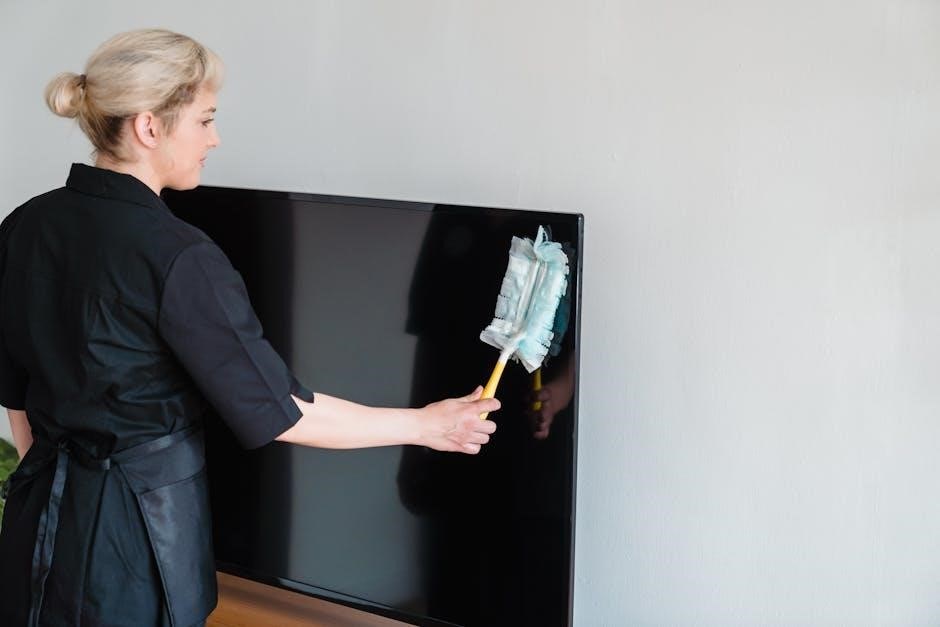
Cleaning the Screen and Exterior

Regularly clean the screen using a soft, dry microfiber cloth to remove dust and fingerprints․ For stubborn marks, lightly dampen the cloth with distilled water, avoiding harsh chemicals․ Turn off the TV before cleaning to prevent streaks․ Avoid touching the screen to minimize oils from skin․ For the exterior, wipe with a damp cloth, then dry thoroughly to prevent moisture damage․ Clean gently to maintain the TV’s appearance and functionality․

Updating the TV’s Software

Keep your Samsung UN32EH4003F TV up-to-date by regularly checking for software updates․ Connect the TV to the internet, then navigate to the Settings menu, select “Support,” and choose “Software Update․” Follow on-screen instructions to download and install the latest version․ Ensure a stable internet connection during the process․ Updating enhances performance, adds new features, and fixes potential issues, ensuring optimal functionality and security for your device․

Accessories and Additional Features

Enhance your Samsung UN32EH4003F experience with recommended accessories like wall mounts, HDMI cables, and soundbars․ Explore additional features such as the Samsung Smart TV platform for streaming and multi-device control, ensuring a seamless entertainment experience tailored to your needs․

Recommended Accessories for Enhanced Experience

Enhance your Samsung UN32EH4003F experience with essential accessories․ A wall mount ensures optimal viewing angles, while a soundbar boosts audio quality․ Invest in high-quality HDMI cables for 4K streaming and a universal remote for seamless control․ Additionally, consider a screen cleaning kit to maintain the display and a compatible wireless keyboard for smart TV navigation․ These accessories elevate your entertainment setup and ensure long-term satisfaction․

Using the Samsung Smart TV Platform

The Samsung Smart TV platform offers a seamless entertainment experience, enabling easy access to popular streaming apps like Netflix, Hulu, and more․ Use voice control via the remote to navigate effortlessly․ Customize your home screen, sync with other devices, and enjoy multi-device control for a unified experience․ This intuitive platform enhances your viewing experience and keeps you connected to your favorite content․

Frequently Asked Questions

This section addresses common queries about the Samsung UN32EH4003F, such as connectivity issues, picture settings, and sound problems․ Find solutions and tips to enhance your viewing experience․

Common Queries About the UN32EH4003F

This section addresses common questions about the Samsung UN32EH4003F, such as connectivity issues, picture settings, and sound problems․ Users often inquire about troubleshooting steps for distorted images, audio delays, or HDMI port malfunctions․ Additionally, queries about software updates, remote control functionality, and compatible devices are frequently discussed․ Find clear solutions and tips to resolve these issues and enhance your viewing experience with detailed guidance․

Where to Download the Full Manual

To access the complete Samsung UN32EH4003F manual, visit the official Samsung support website or authorized service centers․ You can also find it on trusted platforms like ManualsLib or by searching specific model-related forums․ Ensure you download from reliable sources to avoid unauthorized content․ Visit Samsung Support for the most accurate and updated version of the manual․

Maximize your Samsung UN32EH4003F experience with this guide․ Optimize settings for crystal-clear visuals and immersive sound․ Discover tips for enhanced performance and maintenance․ Enjoy your TV like never before!

Final Tips for Maximizing Your TV Experience

For an optimal experience with your Samsung UN32EH4003F, regularly update the software and clean the screen to maintain performance․ Adjust picture settings based on content and lighting․ Explore the Smart TV platform for additional features․ Refer to the manual for troubleshooting and customization tips to ensure your TV delivers the best visuals and sound consistently․ Enjoy enhanced viewing with these simple yet effective practices․


field manual 21 76

Category : Manuals

The U.S. Army Field Manual FM 21-76 is a comprehensive survival guide covering navigation, shelter-building, and first aid techniques. It ensures preparedness in diverse environments, from deserts to jungles, making it an essential resource for military personnel and civilians alike.

1.1 Overview of the Manual

Field Manual 21-76 provides essential survival techniques for various environments. It covers shelter construction, water procurement, and navigation methods. The manual is designed for military personnel but is also useful for civilians. It includes practical advice on finding food, treating injuries, and maintaining mental resilience. Written in clear, accessible language, it serves as a versatile guide for survival in diverse conditions, from deserts to jungles.

1.2 Purpose and Scope

Field Manual 21-76 is designed to equip individuals with critical survival skills in diverse environments. Its purpose is to provide practical guidance on navigating, finding food, and building shelter. The manual covers survival techniques for arctic, desert, jungle, and temperate climates, ensuring comprehensive preparedness. It serves as a vital resource for military personnel and civilians alike, offering actionable strategies to stay alive in challenging situations.

1.3 Target Audience

Field Manual 21-76 is primarily intended for U.S. Army personnel, including Rangers and light Infantry units, but its practical guidance extends to civilians and outdoor enthusiasts. The manual serves as a versatile resource for anyone needing survival skills, ensuring preparedness in various environments. Its clear instructions make it accessible to individuals of all experience levels, providing essential tools for staying safe in challenging situations.

Key Survival Principles

Survival depends on mental strength, preparedness, and adaptability. The manual emphasizes staying calm, assessing situations, and using available resources effectively to overcome challenges in any environment.

2.1 The Will to Survive

The will to survive is the foundation of all survival efforts. It drives individuals to stay positive, adapt, and overcome adversity. Mental resilience is crucial, as fear and panic can impair decision-making. Staying focused and maintaining a positive mindset helps in exploiting resources effectively and enduring hardships. This mindset is non-negotiable for navigating life-threatening situations successfully.

2.2 Understanding Survival Priorities

Survival priorities dictate actions to stay alive. Water, food, shelter, and signaling are critical. Always assess your situation to allocate resources effectively. Prioritize water over food, as dehydration accelerates rapidly. Shelter protects from environmental hazards, while signaling increases chances of rescue. Adapting priorities based on surroundings ensures efficient use of energy and resources. This systematic approach enhances survival likelihood in any environment.

Shelter and Protection

Shelter protects from environmental hazards and conserves energy. Use natural materials like leaves, branches, and snow for construction. Techniques include lean-to and debris hut methods.

3.1 Types of Shelters

Shelters are categorized based on environment and resources. Lean-to shelters use a ridgepole and sides for quick protection. Debris huts are constructed from natural materials like branches and leaves. Snow shelters, such as quinzees, are built by hollowing out snow mounds. Each type offers protection from wind, rain, and extreme temperatures, ensuring survival in diverse climates. Proper construction ensures safety and energy conservation.

3.2 Materials for Shelter Construction

Natural materials like branches, leaves, and snow are ideal for shelter building. Poles, grasses, and pine needles can form sturdy frameworks. In wooded areas, fallen trees and evergreen boughs provide excellent insulation. Arctic environments may require snow blocks or ice for construction. Always use materials that blend with the surroundings to maintain camouflage. Adaptability and resourcefulness are key to building effective shelters in any climate.

3.3 Choosing the Right Location

Selecting a shelter location is critical for survival. Look for areas with natural protection from wind, rain, and extreme temperatures. Ensure proximity to a water source but avoid low-lying areas prone to flooding. Choose elevated ground for better drainage and visibility. Avoid areas with standing water to reduce the risk of insects and disease. Consider the direction of the sun and wind to optimize warmth and shelter effectiveness. Blend your shelter with the surroundings for camouflage.

Finding Food and Water

Finding food and water are survival essentials. Learn water procurement techniques, identify edible plants, and safely purify water. Understand hunting and trapping methods to sustain yourself effectively.

4.1 Water Procurement Techniques

Water procurement is critical for survival. Techniques include purifying water using filtration, boiling, or solar disinfection. Locate natural sources like streams or springs. Use tools like water filters or sand to remove impurities. Transpiration methods, such as creating solar stills, can extract water from plants. Always ensure water is safe to drink to prevent illness. Proper techniques guarantee a reliable water supply in any environment, enhancing survival chances significantly.

4.2 Identifying Edible Plants

Identifying edible plants is crucial for survival. Use the Universal Edibility Test to determine safety: test leaves, stems, and roots separately. Avoid plants with bitter tastes, milky sap, or shiny leaves, as they may be poisonous. Common edible plants include dandelions, clover, and cattails. Learn to recognize safe plants in your environment to supplement your food supply. Always prioritize caution to avoid ingestion of toxic species.

4.3 Hunting and Trapping

Hunting and trapping are essential skills for obtaining food in survival situations. Use snares, traps, and weapons to catch small and large game. Understand animal behavior to increase success. Construct traps using natural materials like cordage and branches. Always prioritize safety and ethical practices when hunting. Follow local regulations and ensure humane treatment of animals. These techniques help sustain food supplies in the wild, enhancing survival chances.

Navigation and Orientation

Navigation and orientation are critical survival skills, focusing on using landmarks, compasses, and natural signs to determine direction and location. These techniques ensure effective travel and mapping.

5.1 Using a Compass

Using a compass is a fundamental navigation skill in survival situations. To navigate effectively, align the compass baseplate with your direction of travel. Ensure the needle settles and points north, then rotate the dial to match your desired heading. Use landmarks to mark your route and set waypoints for precise travel. Always avoid magnetic interference from metal objects to maintain accuracy. This method ensures reliable navigation in unfamiliar territories, day or night, enhancing your survival capabilities significantly.

5.2 Natural Navigation Methods

Natural navigation relies on observing the environment and using celestial bodies. The sun’s movement indicates east and west, while the North Star reveals north. Moon phases can also guide direction. Landmarks like rivers, ridges, and valleys help maintain bearings. By studying shadows, vegetation patterns, and animal tracks, one can navigate without modern tools. These methods, though primitive, are essential for survival when compasses or GPS devices are unavailable or unreliable in remote areas.

5.3 Creating a Mental Map

A mental map is a cognitive tool for tracking one’s position and route. It involves noting landmarks, estimating distances, and remembering terrain features. By visualizing the environment and updating the map as you move, you can maintain orientation and plan routes effectively. This technique is crucial for navigation in unfamiliar areas with limited tools, enhancing situational awareness and reducing the risk of disorientation in survival situations.

Survival Medicine

Survival medicine focuses on preventing and treating injuries, managing wounds, and combating diseases in challenging environments. It emphasizes essential first aid and hygiene practices to sustain health.

6.1 First Aid Basics

First aid is critical in survival situations to prevent minor injuries from becoming life-threatening. Key practices include cleaning and dressing wounds to avoid infection, applying tourniquets to control severe bleeding, and using splints for fractures. Proper first aid also involves monitoring vital signs and maintaining body temperature. Mastering these fundamental techniques is essential for preserving health and stability until professional medical help is available.

6.2 Treating Injuries and Wounds

Proper wound treatment is crucial for survival. Start by cleaning injuries with sterile water to prevent infection. Apply dressings or bandages to protect wounds and promote healing. For severe bleeding, use tourniquets or direct pressure. Immobilize fractures with splints to avoid further damage. Monitor for signs of infection, such as swelling or redness, and use antiseptics if available. Immediate care can significantly improve recovery and prevent life-threatening complications.

6.3 Preventing and Treating Diseases

Preventing disease is critical in survival situations. Ensure clean water sources and food safety to avoid waterborne illnesses. Use insect repellents to prevent mosquito-borne diseases like malaria. Recognize early symptoms of infection, such as fever or swelling. Treat wounds promptly and maintain personal hygiene. Herbal remedies and natural treatments can supplement limited medical supplies. Mental health is also vital, as stress can weaken immunity. Act decisively to prevent diseases from escalating and threatening survival.

Mental and Emotional Survival

Maintaining mental toughness is vital for survival. Stay positive, focus on solutions, and conserve energy. Avoid panic and practice self-discipline to overcome fear and stress effectively.

7.1 Maintaining a Positive Mindset

A positive mindset is crucial for survival. Focus on setting achievable goals, visualize success, and remind yourself of past challenges overcome. Stay calm, avoid negative thoughts, and concentrate on solutions. A resilient attitude helps conserve energy, fosters creativity, and sustains morale. Belief in your abilities and the will to survive are powerful tools against adversity. Maintain discipline to stay focused and make sound decisions under pressure.

7.2 Coping with Stress

Stress management is vital in survival situations. Techniques like deep breathing, mental exercises, and physical activity help maintain emotional balance. Accept the situation, stay focused, and avoid panic. Keeping a routine and staying occupied can reduce anxiety. Positive communication and teamwork within a group also alleviate stress. Remember, stress is natural, but controlling it enhances decision-making and overall survival chances. Stay calm, think clearly, and conserve energy for essential tasks.

Specialized Survival Situations

This section covers survival techniques for extreme environments, including desert, arctic, and jungle scenarios. It addresses unique challenges like extreme temperatures, terrain difficulties, and climate-specific hazards, ensuring adaptability and resilience in varied conditions.

8.1 Desert Survival

Desert survival requires careful water management and protection from extreme heat. Stay hydrated by rationing water, avoiding travel during the hottest parts of the day, and seeking shade. Use natural or improvised shelters, such as sand trenches or tarps, to escape direct sunlight. Reflective surfaces and smoke signals can aid in rescue. Adapt clothing to reflect heat and conserve moisture, ensuring survival in arid environments.

8.2 Arctic Survival

Arctic survival demands managing extreme cold and wind. Build shelters using snow or ice, such as igloos or snow trenches, to insulate from harsh conditions. Stay dry to prevent hypothermia, using layered clothing and protecting extremities. Melt snow for water, and hunt small game for food. Use reflective surfaces or flares for signaling. Prioritize heat conservation and visibility to survive until rescue in the freezing environment.

8.3 Jungle Survival

Jungle survival requires navigating dense vegetation and managing high humidity. Use a machete to clear paths and create shelter. Find or make a clearing for visibility and signaling. Procure water from vines or rainfall. Start fires for warmth and signaling. Identify edible plants and avoid poisonous species. Build shelters like lean-tos or debris huts. Stay elevated to avoid insects and animals. Prevent disease by keeping wounds clean and staying dry. Use smoke or whistles to signal for help.


white rose maths year 2 pdf

Category : United Kingdom

White Rose Maths Year 2 provides a structured approach to learning, focusing on core concepts like number, geometry, and measurement. It offers resources, including PDF worksheets and interactive activities, to support teachers and students in achieving maths mastery through small, incremental steps. This scheme ensures a strong foundation for future learning.

Overview of the White Rose Maths Scheme

The White Rose Maths Scheme is a well-structured, incremental programme designed to help students master key mathematical concepts. It aligns with the UK curriculum, offering a clear progression of skills from Year 1 to Year 8. The scheme emphasizes a ‘concrete-pictorial-abstract’ approach, allowing children to build understanding through hands-on activities, visual representations, and eventually abstract problem-solving. Resources include detailed lesson plans, PDF worksheets, and interactive activities tailored for each year group. Year 2 specifically focuses on number and place value, geometry, measurement, and fractions, providing a solid foundation for future learning. The scheme also incorporates assessment tools and progress tracking to ensure pupils meet curriculum expectations. Its flexibility allows teachers to adapt materials to diverse learning needs, making it a comprehensive and effective tool for maths education.

Importance of Year 2 Maths in the Curriculum

Year 2 Maths plays a pivotal role in establishing a strong mathematical foundation for children. It builds upon earlier concepts, introducing more complex ideas like place value, fractions, and basic geometry. This year is crucial for developing problem-solving skills, mathematical reasoning, and fluency in number operations. The curriculum aligns with the White Rose Maths scheme, ensuring a structured progression of learning. By mastering Year 2 Maths, children gain confidence in tackling everyday problems and prepares them for more advanced topics in subsequent years. The skills learned, such as counting, measuring, and understanding data, are essential for real-world applications. Year 2 Maths also fosters critical thinking and logical reasoning, which are vital for overall academic success. Investing time in this foundational year ensures pupils are well-prepared for the challenges of upper primary education.

Core Concepts Covered in Year 2

Year 2 Maths focuses on number and place value, geometry, measurement, and fractions. These concepts build foundational skills in arithmetic, shape recognition, and data interpretation, preparing pupils for advanced topics.

Number and Place Value

In Year 2, pupils explore number and place value, building on their understanding of counting and basic arithmetic. They learn to count in steps of 2, 3, 5, and 10, forwards and backwards, and use number lines to identify and compare numbers up to 100. The concept of place value is introduced, where children understand the difference between tens and ones, enabling them to solve problems involving addition and subtraction. Grouping objects into sets of 10 and 20 helps develop their ability to count efficiently. Additionally, they learn to represent numbers in words and digits, enhancing their fluency in number-related tasks. These skills are reinforced through activities like creating tally charts and interpreting pictograms, ensuring a solid foundation for more complex maths concepts in later years.

Geometry and Shape

In Year 2, pupils explore geometry and shape through hands-on activities and visual aids. They identify and name common 2D and 3D shapes, such as squares, circles, triangles, cubes, and pyramids. Children learn to describe the properties of shapes, including the number of sides, vertices, and edges. Activities involve sorting shapes, creating patterns, and using everyday objects to identify and compare shapes. Pupils also practice drawing and labeling shapes, reinforcing their understanding of basic geometry. Additionally, they begin to describe the position of shapes using terms like “above,” “below,” “behind,” and “next to.” These skills help build a strong foundation for understanding more complex geometric concepts in later years. Interactive games and practical tasks make learning engaging and accessible for all students.

Measurement and Data Handling

In Year 2, pupils develop essential skills in measurement and data handling. They learn to compare and measure lengths, capacities, and weights using everyday objects. Activities involve using non-standard units, such as hand spans or blocks, before progressing to standard measures like centimeters and liters. Children also explore time concepts, telling the time to the nearest five minutes and sequencing events throughout the day. Money is introduced, with pupils learning to recognize and add coins up to 50p. Data handling skills are developed through creating and interpreting tally charts, pictograms, and simple bar charts. These activities encourage children to collect, organize, and analyze data effectively. Practical tasks and interactive resources, such as White Rose Maths worksheets, support pupils in building confidence and fluency in these areas. These foundational skills are crucial for progressing to more complex measurement and data analysis in later years.

Fractions, Addition, and Subtraction

In Year 2, pupils are introduced to basic fractions, focusing on halves and quarters. They learn to identify and create fractions of shapes and objects, building a foundational understanding of sharing and equality. Addition and subtraction are explored through practical activities, such as counting on and back, using number lines, and applying place value knowledge. Mental math strategies are emphasized, with children learning to solve problems using number bonds and fact families. Worksheets and interactive resources, like those from White Rose Maths, provide structured practice. These skills are reinforced through problem-solving tasks, ensuring pupils can apply their knowledge to real-world scenarios. By the end of Year 2, children are expected to confidently add and subtract two-digit numbers and demonstrate an understanding of simple fractions, preparing them for more complex maths in future years.

Resources and Worksheets

White Rose Maths Year 2 offers a variety of resources, including PDF worksheets, interactive activities, and assessment tools. These materials support teachers in delivering engaging and effective maths lessons, ensuring pupil progress is tracked and supported throughout the year.

PDF Worksheets for Year 2 Maths

White Rose Maths Year 2 PDF worksheets are designed to support children in mastering key maths concepts. These resources cover topics such as number, geometry, and measurement, providing structured activities for pupils to practice their skills. Available in formats like write-on worksheets, they allow children to engage directly with problems, using models and stem sentences to aid understanding. Display versions are also provided for classroom use, making them ideal for teaching demonstrations. The worksheets are aligned with the White Rose Maths scheme, ensuring consistency and progression throughout the year. Teachers can use these resources to identify areas where pupils may need additional support, helping to track progress effectively. With a focus on fluency, reasoning, and problem-solving, the worksheets cater to diverse learning needs, making maths engaging and accessible for all Year 2 pupils.

Interactive Activities and Games

White Rose Maths Year 2 offers a range of interactive activities and games to make learning engaging and fun. These resources are designed to complement the curriculum, providing pupils with hands-on experiences to develop their maths skills. From counting and basic arithmetic to geometry and measurement, the activities are tailored to meet the needs of Year 2 students. Many of these resources are available online, allowing children to practice at home or in the classroom. Games such as maths puzzles, number line activities, and shape sorting exercises help build fluency and reasoning skills. Additionally, interactive tools like digital counting blocks and measurement scales enable pupils to explore concepts visually. These activities cater to different learning styles, ensuring that every child can engage with maths in a way that suits them best. By incorporating play and interactivity, White Rose Maths makes learning maths an enjoyable and effective experience for Year 2 pupils.

Assessment Tools and Progress Tracking

White Rose Maths Year 2 provides a variety of assessment tools and resources to track pupils’ progress effectively. These include PDF worksheets, progress checks, and problem-solving exercises designed to evaluate understanding and mastery of key concepts. The resources are aligned with the curriculum, ensuring that teachers can identify areas where pupils may need additional support. For example, the Spring progress check for Year 2 includes activities like number line tasks and reasoning problems to assess fluency and comprehension. Worksheets with answers are also available, allowing teachers to monitor progress and provide constructive feedback. These tools help pupils build confidence and consolidate their learning while giving teachers a clear insight into their development. By using these resources, educators can ensure that pupils are on track to meet their learning goals and make informed decisions about future lessons;

Implementation and Teaching Strategies

White Rose Maths Year 2 encourages a structured, step-by-step approach with resources like PDF worksheets and interactive activities. Teachers use concrete, pictorial, and abstract methods to ensure deep understanding and mastery of concepts.

Teaching Methods for Effective Learning

The White Rose Maths Year 2 programme employs a structured, sequential approach to teaching, ensuring children build a solid foundation in mathematical concepts. Lessons are designed to progress from concrete to pictorial to abstract representations, helping pupils develop a deep understanding. Teaching methods emphasize fluency, reasoning, and problem-solving skills, with a focus on small, incremental steps to mastery. Resources such as PDF worksheets and interactive activities are used to engage learners and cater to different learning styles. Teachers are encouraged to use formative assessments to track progress and adapt lessons to meet individual needs. The programme also integrates opportunities for collaborative learning and discussion, fostering confidence and mathematical thinking. By aligning teaching strategies with the White Rose Maths framework, educators can ensure consistent and effective delivery of the curriculum.

Remote Learning Support and Materials

White Rose Maths provides comprehensive remote learning support for Year 2 pupils, ensuring continuity in maths education. Printable PDF worksheets and interactive activities are available, covering topics like number, geometry, and measurement. These resources align with the White Rose Maths curriculum, offering structured lessons for home learning. Teachers can access materials such as “Divide by 10” and “Select Money” worksheets, designed to reinforce key concepts. Additionally, the programme includes video lessons and online tools, enabling pupils to engage with maths remotely. Progress tracking sheets and assessment tools help teachers monitor learning from afar. The materials are adaptable, allowing parents and educators to support pupils effectively in a home environment. By integrating these resources, White Rose Maths ensures that remote learning is both accessible and impactful, maintaining high standards of maths education beyond the classroom.


manual vs paddle shifters

Category : Manuals

Manual and paddle shifters offer distinct driving experiences, blending control, convenience, and performance. Understanding their differences helps drivers choose the best option for their lifestyle and preferences.

Definition and Purpose of Manual and Paddle Shifters

A manual transmission requires a driver to use a clutch pedal and gearshift to change gears, offering full control over the vehicle. Paddle shifters, located on the steering wheel, allow manual gear changes without a clutch, blending convenience with driver input. Both systems aim to enhance driving engagement but cater to different preferences and scenarios. Manuals provide an authentic, hands-on experience, while paddle shifters offer simplicity and speed, especially in performance or racing contexts. Understanding their definitions and purposes helps drivers choose the right system for their needs, balancing control, comfort, and practicality.

Importance of Understanding Gear-Shifting Options

Understanding manual and paddle shifters empowers drivers to make informed decisions based on their driving habits and preferences. Manuals offer a traditional driving experience, appealing to enthusiasts who value control and connection with the vehicle. Paddle shifters, on the other hand, provide a modern, convenient alternative, ideal for those seeking ease and efficiency without sacrificing some level of driver engagement. Recognizing the strengths and weaknesses of each system helps optimize performance, comfort, and enjoyment. Whether for daily commuting or high-performance driving, choosing the right gear-shifting option significantly impacts the overall driving experience, making it crucial to evaluate personal needs and preferences carefully.

Manual Transmission: Pros and Cons

Manuals offer a pure driving experience with better control and lower costs. They connect drivers to the vehicle but require skill and effort, especially in traffic.

Advantages of Manual Transmission: Driving Experience and Control

Manual transmissions provide a unique, engaging driving experience, offering direct control over gear shifts. This connection enhances driver involvement and precision, especially on winding roads. With a manual, drivers can optimize engine performance by selecting the right gear for the situation, improving acceleration and efficiency. The ability to downshift for braking control adds to the sense of mastery. For enthusiasts, the tactile feedback of the clutch and gearstick creates a more immersive experience. While requiring more skill, manuals reward drivers with a deeper connection to the vehicle, making every drive feel purposeful and enjoyable.

Disadvantages of Manual Transmission: Complexity and Comfort

Manual transmissions require more skill and effort, as drivers must coordinate clutch pedal presses with gear shifts, which can be complex for newcomers. In heavy traffic or frequent stop-and-go situations, this constant engagement can become tiring and less comfortable. The need to operate a clutch pedal adds to the physical demands, especially in urban driving. Additionally, manual transmissions lack the convenience of automatic or paddle-shifter systems, as they demand continuous driver input. While they offer control, the trade-off is comfort and ease, making them less practical for daily commuting in congested areas. This complexity can deter some drivers seeking a more relaxed driving experience.

Paddle Shifters: Pros and Cons

Paddle shifters combine convenience and speed, offering precise control without a clutch. They are ideal for racing and everyday driving but may lack the full control of manuals.

Advantages of Paddle Shifters: Convenience and Speed

Paddle shifters offer unparalleled convenience and speed, allowing drivers to shift gears without removing their hands from the steering wheel. This feature is particularly beneficial during high-speed maneuvers or sharp turns, where maintaining control is crucial. The instantaneous gear changes enabled by paddle shifters enhance acceleration and responsiveness, making them ideal for both racing and everyday commuting; Additionally, they eliminate the need for a clutch pedal, reducing driver fatigue in heavy traffic. Modern paddle-shift systems are also highly advanced, providing seamless and intuitive operation that appeals to a wide range of drivers, from enthusiasts to those seeking a hassle-free experience.

Disadvantages of Paddle Shifters: Limitations in Control

Paddle shifters, while convenient, have limitations in control compared to manual transmissions. They rely on electronic systems to execute shifts, which can sometimes override driver input to protect the engine, reducing direct control. In automatic mode, the system may not always respond as quickly or precisely as a manual transmission, potentially frustrating drivers who desire more engagement. Additionally, the lack of a clutch pedal means drivers cannot manually control torque during shifts, limiting techniques like heel-and-toe downshifting. While paddle shifters offer speed and ease, they lack the mechanical connection and precision that manual transmissions provide, making them less appealing to driving purists seeking full control over their vehicle.

Direct Comparison: Manual vs. Paddle Shifters

Manual transmissions offer precise control and a mechanical driving feel, while paddle shifters provide convenience and faster shift times without needing a clutch pedal, suiting different priorities.

Performance and Responsiveness: Which is Faster?

Paddle shifters generally deliver faster shift times compared to manual transmissions, thanks to their automated clutch systems and quick electronic actuation. Modern paddle-shift systems can execute gear changes in milliseconds, making them highly responsive in racing or high-performance scenarios. However, manual transmissions provide a more direct connection to the vehicle, allowing drivers to feel each shift and maintain control. While paddle shifters excel in speed and convenience, manuals offer a tactile driving experience that many enthusiasts prefer. The choice between the two often depends on whether speed or driver engagement is prioritized.

Practicality and Ease of Use: Which is More Accessible?

Paddle shifters are more accessible and practical for everyday use, offering ease of operation without requiring manual clutch control. They are ideal for commuting in heavy traffic, as they allow drivers to keep both hands on the wheel while shifting gears effortlessly. This convenience makes paddle shifters more forgiving, especially for those unfamiliar with manual transmissions. In contrast, manual transmissions demand more skill and attention, as drivers must coordinate clutch and accelerator pedals. While manuals provide a more engaging experience, paddle shifters are better suited for urban environments and drivers seeking hassle-free performance.

Scenarios for Choosing Manual or Paddle Shifters

Manuals suit enthusiasts seeking control and driving engagement, while paddle shifters are perfect for everyday commuting and racing, offering convenience and faster gear changes effortlessly.

Best Uses for Manual Transmission: Enthusiast Driving

Manual transmissions are ideal for driving enthusiasts who crave a hands-on experience. They provide direct control over gear shifts, enhancing the connection between driver and vehicle. On winding roads or racetracks, manuals allow precise acceleration and deceleration, making every drive engaging. The clutch and gearstick require skill, fostering a sense of accomplishment and joy. For purists, the tactile feedback and mechanical interaction are irreplaceable, creating a more immersive and rewarding driving experience compared to automatics or paddle shifters. Manuals are perfect for those who value driving as an art and seek to maximize their involvement in the process.

Best Uses for Paddle Shifters: Everyday Commuting and Racing

Paddle shifters excel in scenarios where convenience and speed are paramount. For everyday commuting, they offer seamless gear changes without the need for a clutch, reducing fatigue in traffic. Their ease of use makes them accessible to drivers of all skill levels. In racing or performance driving, paddle shifters provide quick, precise shifts, allowing drivers to maintain focus on the road. They are particularly advantageous on tracks, where rapid gear changes can shave seconds off lap times. This dual functionality makes paddle shifters a versatile choice for both daily driving and high-performance situations, catering to a wide range of driver needs and preferences effectively.

Future of Gear-Shifting Technologies

Advancements in paddle shifters and automatics are redefining driving, with faster shift times and seamless integration with future automotive technologies, ensuring enhanced performance and driver adaptability.

Evolution of Paddle Shifters and Automatic Transmissions

Paddle shifters have evolved significantly, offering faster and smoother gear changes compared to traditional manuals. Modern systems integrate advanced software, optimizing performance and responsiveness. Automatic transmissions now incorporate paddle shifters, blending convenience with driver control. These innovations enhance both everyday commuting and racing experiences, making them versatile for various driving scenarios. The seamless integration of technology ensures a balance between efficiency and driving enjoyment, catering to a wide range of preferences and needs. As automotive technology advances, paddle shifters and automatics continue to redefine the future of gear-shifting, providing unparalleled adaptability and performance for drivers worldwide.

Impact of Advancements on Driver Preference

Advancements in paddle shifters and automatics have significantly influenced driver preferences. Many drivers now favor paddle shifters for their blend of convenience and control, especially in everyday commuting and racing scenarios; The enhanced responsiveness and faster shift times of modern paddle systems appeal to enthusiasts seeking a more engaging experience without the complexity of manual transmissions. Conversely, purists still appreciate the tactile connection of manuals, valuing the authentic driving experience. These innovations have broadened the market, allowing drivers to choose options that align with their lifestyle, whether prioritizing performance, comfort, or simplicity. The evolution of gear-shifting technologies continues to cater to diverse preferences, ensuring a personalized driving experience for all.


2002 harley-davidson service manual pdf free download

Category : PDF

The 2002 Harley-Davidson Service Manual is a comprehensive guide for maintaining and repairing your bike. It includes detailed procedures, diagnostic tips, and parts catalogs. Download the free PDF from trusted sources like official Harley-Davidson websites or reputable third-party forums for DIY enthusiasts.

Where to Download the 2002 Harley-Davidson Service Manual PDF for Free

The 2002 Harley-Davidson Service Manual PDF can be downloaded for free from the official Harley-Davidson website or reputable third-party forums specializing in motorcycle repair resources.

Official Harley-Davidson Website and Resources

The official Harley-Davidson website offers a wealth of resources for owners, including service manuals. Visit their support section to access the 2002 service manual directly. They provide detailed guides and specifications, ensuring authenticity and reliability. Additionally, authorized dealers often host downloadable PDF versions, making it easy to obtain the manual without additional costs. These official sources guarantee accurate information, essential for proper maintenance and repairs. For a seamless experience, explore Harley-Davidson’s digital library or contact local dealers for assistance.

Third-Party Websites and Forums

Third-party websites and forums are popular sources for downloading the 2002 Harley-Davidson service manual. Websites like ManualsLib, ServiceManuals.net, and Harley-Davidson enthusiast forums often host free PDF versions. These platforms cater to DIY enthusiasts and mechanics, offering easy access to the manual. Additionally, forums such as HD Forums or Reddit communities provide direct links and advice from experienced users. Many of these sites are trustworthy and regularly updated, ensuring the manual’s availability. However, users should exercise caution to avoid unofficial or malicious links. Always verify the source’s reliability before downloading to ensure safety and authenticity. Third-party resources are a convenient alternative for those who prefer not to purchase directly from official channels. They offer a cost-effective solution for accessing the essential information needed for maintenance and repairs.

What the 2002 Harley-Davidson Service Manual Includes

The 2002 Harley-Davidson Service Manual includes maintenance procedures, repair guides, troubleshooting tips, and detailed parts catalogs. It covers diagnostic codes, essential tools, and specifications for optimal bike performance.

Maintenance Procedures and Schedules

The 2002 Harley-Davidson Service Manual provides detailed maintenance procedures and schedules to ensure your bike runs optimally. Regular oil changes, tire pressure checks, and brake inspections are outlined. The manual also covers routine tasks like air filter cleaning and spark plug replacement. Scheduled maintenance intervals are specified to prevent wear and tear. Additionally, guidelines for lubricating moving parts and inspecting drive belts are included. These procedures are designed to keep your motorcycle in peak condition, ensuring reliability and performance. By following the recommended schedules, you can extend the life of your Harley-Davidson and maintain its value. The manual emphasizes the importance of timely maintenance to avoid costly repairs. Whether you’re a seasoned rider or a DIY enthusiast, this section offers clear, step-by-step instructions for keeping your bike in top shape.

Repair and Troubleshooting Guides

The 2002 Harley-Davidson Service Manual offers extensive repair and troubleshooting guides to diagnose and fix common issues. Detailed step-by-step instructions are provided for engine, transmission, and electrical system repairs. Troubleshooting charts help identify problems quickly, while wiring diagrams assist with electrical diagnostics. The manual covers procedures for replacing parts like brakes, suspension components, and fuel system elements. DIY enthusiasts will appreciate the clear instructions for disassembling and reassembling components. The guide emphasizes safety precautions to avoid damage or injury. With this section, riders can address issues confidently, reducing reliance on professional mechanics. The manual ensures that repairs are done correctly, maintaining the bike’s performance and reliability. Whether addressing minor fixes or complex overhauls, the repair section is an invaluable resource for Harley-Davidson owners seeking to keep their bikes in optimal condition.

Parts Catalog and Specifications

The 2002 Harley-Davidson Service Manual includes a detailed parts catalog and specifications for accurate identification and ordering of components. This section provides part numbers, descriptions, and compatibility information for various models, ensuring users can source the correct items for their bike. Torque specifications, bolt sizes, and fluid capacities are clearly outlined to prevent errors during repairs. The catalog covers everything from engine components to electrical systems, making it easier to maintain or upgrade the motorcycle. Diagrams and tables help visualize how parts fit together, while the specifications ensure repairs meet factory standards. This section is essential for DIY enthusiasts and professional mechanics alike, providing a reliable reference for maintaining the integrity and performance of the 2002 Harley-Davidson models.

Tips for Using the Service Manual Effectively

Familiarize yourself with diagnostic codes and procedures to identify issues quickly. Use the specified tools and equipment for precise repairs. Always follow safety guidelines and refer to the parts catalog for accurate replacements.

Understanding Diagnostic Codes and Procedures

Understanding diagnostic codes is crucial for identifying and resolving issues with your 2002 Harley-Davidson. The service manual provides detailed explanations of error codes, helping you pinpoint problems quickly. Familiarize yourself with the manual’s diagnostic section to interpret codes accurately. Use scan tools or consult the troubleshooting guide for precise repairs. Always refer to the manual for specific procedures to ensure safety and avoid further damage. Regularly updating your knowledge of diagnostic processes will enhance your ability to maintain and repair your motorcycle effectively. By following the manual’s guidelines, you can address issues confidently and keep your bike in optimal condition.

Essential Tools and Equipment for Repairs

For effective repairs on your 2002 Harley-Davidson, gather essential tools and equipment. Start with basics like wrenches, screwdrivers, pliers, and a socket set. Consider specialized tools such as a torque wrench and specific wrenches for unique bolts. A wiring diagram is invaluable for electrical work. Safety gear like gloves and safety glasses is a must. Invest in a jack, jack stands, and a work light for visibility and safety. Keep lubricants and cleaning supplies on hand for maintenance and repairs. Refer to your service manual for a recommended tool list, which may include parts catalogs and specifications. Organize your workspace with a clean, well-lit area, a workbench, and storage solutions. Prioritize tools based on common repairs and consider cost-effective options or community recommendations for specialized tools.

Common Issues Addressed in the 2002 Manual

The 2002 Harley-Davidson Service Manual covers common issues like engine performance, electrical system malfunctions, and routine maintenance. It provides solutions for optimizing your bike’s functionality and longevity.

Engine Performance and Tuning

The 2002 Harley-Davidson Service Manual provides detailed guidance on engine performance and tuning for optimal functionality. It covers procedures for diagnosing and addressing common issues such as rough idling, decreased power output, or poor fuel efficiency. The manual includes specifications for adjusting the fuel injection system, fine-tuning the ignition timing, and ensuring proper air-fuel mixture. Additionally, it offers step-by-step instructions for performing routine maintenance tasks like cleaning or replacing the air filter, inspecting and maintaining the spark plugs, and checking the exhaust system for leaks or damage. Troubleshooting sections help identify and resolve problems related to engine overheating, low compression, or faulty sensors. By following the manual’s recommendations, riders can enhance their bike’s performance, improve fuel efficiency, and extend the lifespan of the engine. This section is essential for both novice and experienced riders seeking to maximize their Harley-Davidson’s potential.

Electrical System Repairs

The 2002 Harley-Davidson Service Manual dedicates a detailed section to electrical system repairs, ensuring riders can diagnose and resolve issues efficiently. It provides comprehensive wiring diagrams, circuit descriptions, and troubleshooting guides for common electrical problems. The manual covers procedures for testing batteries, charging systems, and starters, as well as repairing or replacing faulty components like fuses, relays, and sensors. Instructions are included for diagnosing issues with the ignition system, lights, and accessories. Additionally, the manual offers guidance on identifying and repairing wiring harness faults, which are often a source of electrical malfunctions. By following the step-by-step instructions, riders can restore their bike’s electrical system to optimal functionality, ensuring reliability and safety on the road. This section is invaluable for addressing everything from dim headlights to faulty gauges, helping riders maintain their Harley-Davidson’s electrical integrity.


guided moose hunts in canada

Category : Guide

Canada is renowned for its exceptional guided moose hunts‚ offering experienced guides‚ prime territories‚ and high success rates. Explore vast wilderness and trophy opportunities with expert guidance.

Overview of Moose Hunting in Canada

Canada offers some of the world’s best moose hunting experiences‚ with vast wilderness areas and abundant populations. Guided hunts provide expertise‚ ensuring safety and success. Provinces like Alberta‚ Manitoba‚ and Newfoundland boast prime habitats‚ while experienced guides maximize opportunities. From rut season strategies to late-season tactics‚ Canada’s diverse landscapes and thriving moose populations make it a top destination for hunters seeking adventure and trophy-quality animals.

Why Choose Guided Hunts?

Guided moose hunts in Canada offer unparalleled expertise‚ ensuring a safe and successful experience. Experienced guides provide in-depth knowledge of territories‚ animal behavior‚ and hunting strategies. They handle logistics‚ from tracking to trophy preparation‚ allowing hunters to focus on their adventure. Guided hunts also ensure compliance with regulations‚ maximizing success rates and delivering memorable experiences in Canada’s vast wilderness.

Popular Moose Hunting Provinces

Canada’s top moose hunting provinces include Alberta‚ Saskatchewan‚ British Columbia‚ and Ontario. Alberta offers vast territories with abundant moose populations‚ while Saskatchewan’s diverse landscapes ensure high success rates. British Columbia boasts pristine wilderness and trophy-sized moose. Ontario’s forests provide ideal habitats‚ making it a favorite for hunters. Each province offers unique experiences‚ catering to both novice and experienced hunters seeking memorable adventures.

Best Locations for Guided Moose Hunts

Canada’s vast wilderness offers prime moose hunting locations‚ including Alberta’s forests‚ Saskatchewan’s abundant territories‚ British Columbia’s diverse habitats‚ and Ontario’s dense woodlands‚ ensuring unforgettable hunting experiences.

Alberta’s Prime Moose Territories

Alberta is renowned for its prime moose hunting territories‚ offering vast boreal forests‚ wetlands‚ and rolling hills. With over 200 bull moose harvested since 1997‚ the region boasts a high success rate. Hunters can explore areas like the Peace River Valley and northern Alberta‚ where guides expertly navigate the terrain. The post-rut season in November is ideal for targeting bulls in bachelor groups‚ ensuring a memorable experience.

Saskatchewan’s Abundant Moose Populations

Saskatchewan is a top destination for moose hunting due to its thriving populations. The province’s diverse landscape‚ including farmland‚ forests‚ and wetlands‚ provides ideal habitats. With a reputation for abundant moose‚ Saskatchewan offers hunters a high chance of success. The region’s terrain is relatively accessible‚ making it less physically demanding. November post-rut hunts are particularly effective‚ as bulls often gather in bachelor groups‚ enhancing strategic hunting opportunities.

British Columbia’s Diverse Moose Habitats

British Columbia boasts diverse moose habitats‚ from dense forests to coastal regions‚ supporting a robust population. The province’s vast wilderness offers abundant opportunities for hunters. Combo hunts for moose‚ elk‚ and mountain goat are popular‚ leveraging BC’s rich ecosystems. With expert guides‚ hunters can navigate this varied terrain‚ maximizing their chances of a successful and memorable moose hunting experience.

Ontario’s Forested Moose Regions

Ontario’s vast‚ remote wilderness offers prime moose hunting opportunities. Its dense forests and abundant wildlife make it a hotspot for guided hunts. Experienced guides navigate the terrain‚ ensuring success. With trophy-sized moose and scenic landscapes‚ Ontario provides an unforgettable hunting experience. Many outfitters offer comprehensive packages‚ including airfare‚ accommodations‚ and expert guidance‚ catering to both residents and non-residents seeking a memorable adventure.

Seasons and Timing for Moose Hunts

Canada’s moose hunting seasons vary by province‚ with peak rut activity in September and late-season hunts in November. Timing is crucial for success‚ and expert guides ensure optimal results.

The Rut Season: Peak Moose Activity

The rut season in Canada‚ typically occurring in September with key dates like September 12-19 and 21-28‚ is a prime time for moose activity. During this period‚ bull moose are vocal and actively seeking mates‚ making them more detectable. Experienced guides use strategic calling techniques to attract these bulls. Their in-depth knowledge of moose behavior ensures high success rates and exciting hunting experiences.

Late Season Hunts: Strategies and Success

Late season moose hunts in Canada‚ typically occurring in November‚ offer unique opportunities as bulls regroup post-rut. Guides employ spot-and-stalk tactics‚ targeting bachelor groups. Success rates remain high due to experienced guides adapting strategies to late-season behaviors. Hunters benefit from cooler weather and focused animal patterns‚ making November a prime time for harvesting trophy moose with guided expertise.

The Guided Moose Hunting Experience

Guided moose hunts in Canada offer a thrilling adventure with expert guides leading through vast wilderness. Experience high success rates and world-class trophy opportunities in breathtaking landscapes and diverse habitats.

Role of Experienced Guides

Experienced guides play a crucial role in Canada’s guided moose hunts‚ offering in-depth knowledge of prime territories‚ effective strategies‚ and field expertise. They ensure hunters are well-prepared‚ maximize success rates‚ and provide support from tracking to field dressing‚ enhancing the overall hunting experience with their professionalism and local insights.

Common Hunting Methods and Tactics

Guided moose hunts in Canada often employ spot-and-stalk tactics‚ calling during the rut‚ and baiting strategies. Guides use their expertise to track and locate moose‚ while hunters may use rifles or bows. During the rut‚ bull moose are lured using calls‚ increasing chances of success. Terrain and season dictate methods‚ ensuring a well-planned and executed hunting experience tailored to maximize results.

Terrain and Physical Requirements

Guided moose hunts in Canada take place in diverse terrains‚ including dense forests‚ wetlands‚ and remote wilderness areas. Hunters should be prepared for moderate to challenging physical activity‚ depending on the location. Vast territories often require hiking‚ wading‚ and navigating rugged landscapes. While some areas offer easier access‚ others demand stamina and endurance to traverse the expansive and varied habitats where moose reside.

Costs and Packages

Guided moose hunts in Canada vary in cost‚ with packages offering options like meals‚ lodging‚ and transportation. Prices depend on location‚ duration‚ and services included‚ ensuring a tailored experience for hunters.

What to Expect in a Typical Package

A typical guided moose hunt package includes meals‚ lodging‚ and transportation‚ often with experienced guides contributing to high success rates. Packages typically span 6–10 days‚ with opportunities for combo hunts targeting elk or bear. Additional activities like fishing or upland bird hunting may be included‚ ensuring a complete and memorable wilderness experience.

Factors Affecting Hunt Pricing

Hunt pricing varies based on location‚ with remote areas requiring fly-ins increasing costs. Accommodation quality‚ from basic camps to luxury lodges‚ also impacts fees. Licensing for non-residents adds expenses‚ while package inclusions like meals and guides influence pricing. Seasonal timing‚ such as rut or late-season hunts‚ affects demand and cost. Trophy potential and outfitter reputation further shape pricing structures.

Licensing and Regulations

Licensing requirements vary for residents and non-residents‚ with fees differing by province. Non-resident licenses often cost around $189‚ while regulations ensure ethical and sustainable hunting practices.

Requirements for Residents vs. Non-Residents

Licensing requirements for moose hunting differ between Canadian residents and non-residents. Residents typically need a provincial hunting license‚ while non-residents must purchase a specific non-resident license‚ costing around $189. Non-residents often require guiding services in certain provinces‚ while residents may hunt independently. Both must adhere to provincial regulations‚ ensuring ethical and legal hunting practices.

Ensuring Ethical and Legal Hunting Practices

Ethical hunting practices are essential in Canadian guided moose hunts. Guides emphasize fair chase‚ respecting animal welfare‚ and minimizing environmental impact. Hunters must adhere to provincial regulations‚ ensuring proper licensing and lawful harvesting. Selective hunting practices‚ such as targeting mature bulls‚ help maintain healthy moose populations. These efforts promote sustainability and conserve Canada’s wild resources for future generations.

Success Rates and Trophy Quality

Guided moose hunts in Canada boast high success rates‚ with experienced guides contributing to productive outings. Hunters often harvest large‚ trophy-quality moose‚ reflecting the country’s abundant wildlife.

Historical Success Rates in Canada

Guided moose hunts in Canada have consistently high success rates‚ with many outfitters reporting over 90% success. Experienced guides‚ abundant moose populations‚ and well-managed habitats contribute to these impressive outcomes. Historical data shows that hunters often achieve their goals‚ particularly during peak rut seasons‚ making Canada a top destination for moose hunting enthusiasts seeking reliable and rewarding experiences.

Average Size and Trophy Potential

Canadian moose are renowned for their impressive size‚ with bulls averaging antler spans of up to 122 cm and weighing between 360-590 kg. The trophy potential is exceptional‚ particularly in regions like British Columbia and Alberta‚ where genetics and habitat yield larger animals. These areas are popular among hunters for their reputation in producing trophy-class moose‚ making them a top destination for those seeking significant and memorable trophies‚ with guided hunts often ensuring successful outcomes.

Additional Activities and Opportunities

Guided moose hunts in Canada often offer opportunities to combine with other game hunting or fishing. Many outfitters provide access to grouse hunting and world-class fishing experiences‚ enhancing your adventure.

Combining Moose Hunts with Other Game

Guided moose hunts in Canada often allow hunters to pursue other game‚ such as deer‚ bear‚ or upland birds. Combo hunts are popular‚ offering the chance to harvest multiple species during one trip. Many outfitters provide licenses for elk‚ grouse‚ or waterfowl‚ maximizing your adventure. This approach ensures a diverse and memorable experience in Canada’s vast wilderness‚ tailored to your interests and location.

Optional Activities Like Fishing

After a successful moose hunt‚ many outfitters offer optional fishing opportunities on Canada’s pristine lakes and rivers. Hunters can obtain angling licenses to catch species like trout or pike‚ adding a relaxing dimension to their trip. Fishing excursions allow participants to immerse themselves in Canada’s stunning wilderness‚ creating a well-rounded outdoor adventure that combines hunting and fishing seamlessly.

Top Outfitters and Their Reputation

Canada’s top outfitters‚ like Smoky River and Big Sand Lake Lodge‚ boast high success rates and experienced guides‚ ensuring unforgettable moose hunting adventures with exclusivity.

Recommended Outfitters Across Provinces

Smoky River Outfitting in Alberta and Big Sand Lake Lodge in Manitoba are top choices‚ offering exclusive territories and high success rates. Lac Seul Lodge in Ontario provides premium guided hunts‚ while Yukon Peak Outfitters specializes in trophy moose. These reputable outfitters ensure exceptional experiences with experienced guides and access to prime moose habitats across Canada.

What to Look for in a Reputable Guide Service

Reputable guide services offer experienced guides‚ high success rates‚ and legal compliance. Look for outfitters with exclusive territories‚ proper licensing‚ and ethical practices. Ensure they provide necessary equipment and accommodations. Check reviews‚ ask about experience‚ and verify certifications to ensure a safe and successful hunting experience in Canada’s vast wilderness.

Conservation and Sustainability

Conservation efforts are crucial for maintaining healthy moose populations. Guided hunts support sustainable practices‚ ensuring balanced ecosystems and ethical hunting standards in Canada’s wilderness.

Role of Hunting in Moose Conservation

Regulated moose hunting plays a key role in conservation by controlling populations and maintaining balanced ecosystems. It generates revenue for conservation efforts through licenses and permits‚ while also funding research and education. Hunting helps prevent overgrazing and habitat degradation‚ ensuring sustainable wildlife management and the long-term health of moose populations in Canada.

Best Practices for Ethical Hunting

Ethical hunting involves respecting wildlife‚ minimizing waste‚ and ensuring humane practices. Hunters should prioritize fair chase‚ avoid unnecessary harm‚ and use responsible shooting techniques. Proper field dressing and utilizing harvested animals fully are essential. Adherence to local regulations and respect for nature ensure sustainable and respectful moose hunting experiences in Canada’s wilderness.

Guided moose hunts in Canada offer an unforgettable experience‚ combining vast wilderness‚ expert guides‚ and abundant wildlife for a successful and memorable adventure in nature.

Final Thoughts on Guided Moose Hunts

Guided moose hunts in Canada offer an unparalleled outdoor experience‚ combining expert guidance‚ pristine wilderness‚ and high success rates. With trophy-quality animals and diverse landscapes‚ hunters can expect an unforgettable adventure. Whether for meat or trophy‚ these hunts provide a chance to connect with nature and create lasting memories. Plan your hunt carefully to ensure a safe and rewarding experience.

Encouragement to Plan Your Hunt

Embark on an unforgettable adventure with guided moose hunts in Canada. With experienced guides‚ vast territories‚ and high success rates‚ this is your chance to harvest a trophy-sized moose. Whether you’re a seasoned hunter or a first-timer‚ the expertise of guides ensures a memorable experience. Start planning today and make your Canadian moose hunting dreams a reality in the pristine wilderness.


minnie mouse flower power 4×4 assembly instructions

Category : Instructions

Discover the charm of building Minnie Mouse Flower Power 4×4, a delightful DIY project perfect for Disney enthusiasts and crafting hobbyists. This 2925-piece set offers a fun, creative assembly experience with step-by-step guidance, bringing Minnie’s floral-inspired design to life. Ideal for those who enjoy hands-on projects and collectible Disney-themed builds.

Overview of the Minnie Mouse Flower Power 4×4 Kit

The Minnie Mouse Flower Power 4×4 Kit is a charming DIY assembly set designed for Disney enthusiasts and crafting fans. It features a unique floral-inspired design, capturing Minnie Mouse’s iconic style with intricate details. The kit includes a variety of components, such as the base structure, decorative elements, and movable parts, all carefully crafted to bring the character to life. With its colorful and whimsical theme, this set is perfect for both experienced builders and newcomers looking for a fun, creative project. The assembly process is designed to be engaging and rewarding, allowing builders to personalize their creation while enjoying the step-by-step journey.

Each piece is thoughtfully designed to ensure a seamless assembly experience, making it an excellent choice for families, hobbyists, or collectors seeking a delightful Disney-themed addition to their creations.

Importance of Following Assembly Instructions

Following the assembly instructions for the Minnie Mouse Flower Power 4×4 kit is crucial for a successful and enjoyable building experience. The instructions are carefully designed to guide you through each step, ensuring that all components fit together properly and the final result matches the intended design. By adhering to the instructions, you can avoid confusion and potential errors, saving time and effort. Proper assembly also ensures that the structure is stable and durable, allowing you to display your finished creation with pride.

Additionally, following the instructions helps you appreciate the intricate details and craftsmanship of the kit. This attention to detail is especially important for a character-themed build like Minnie Mouse, where accuracy and aesthetics are key to capturing her charm.

Safety Precautions and Tools Needed

Ensure a smooth assembly by following safety guidelines and gathering necessary tools, essential for a successful Minnie Mouse Flower Power 4×4 building experience.

Essential Tools for Assembly

To successfully assemble the Minnie Mouse Flower Power 4×4, gather the following essential tools: a screwdriver set, Allen wrench, pliers, and a small hammer. Safety glasses and a dust mask are recommended to protect against small debris. Ensure all tools are in good condition to avoid stripped screws or damaged parts. A clean, flat workspace is crucial for organizing components efficiently. Optional tools like a work lamp or magnetic tray can enhance precision and reduce part misplacement. Always refer to the instruction manual for specific tool recommendations tailored to the kit. Proper tool preparation ensures a smooth and enjoyable assembly process, minimizing delays and potential errors.

Safety Guidelines for Builders

Before starting the Minnie Mouse Flower Power 4×4 assembly, ensure a safe working environment. Clear the workspace of clutter and tripping hazards. Wear safety glasses to protect eyes from small flying parts. Avoid loose clothing that could get caught in tools. Keep children and pets away to prevent accidents. Use tools correctly to avoid injury; never force parts together. If a piece doesn’t fit, refer to the manual or seek assistance. Work in a well-ventilated area, especially when using adhesives. Take regular breaks to avoid fatigue. Store sharp objects and tiny components out of reach. Follow all safety precautions to ensure a safe and enjoyable building experience. Always prioritize safety to prevent injuries and ensure successful assembly.

Step-by-Step Assembly Instructions

Follow a comprehensive guide to assemble Minnie Mouse Flower Power 4×4, starting with sorting pieces, aligning components, and securing with adhesives. This detailed process ensures accuracy and a polished finish.

Preparing the Base and Main Structure

Begin by carefully sorting and categorizing the pieces to ensure efficient assembly. Start with the base plate, aligning edges precisely to form the foundation. Use a flat surface and apply even pressure to secure the initial layers. Next, identify and attach the main structural components, such as the frame and supports, ensuring proper alignment. Apply adhesive as directed, following the instructions for drying times. Once the base is stable, proceed to add the middle layers, carefully fitting each piece to maintain balance and symmetry. Regularly check the alignment using a ruler or guide to avoid misplacement. Allow the structure to set completely before moving on to decorative elements. A well-prepared base ensures the entire build remains sturdy and visually appealing.

Attaching Wheels and Moving Parts

Start by identifying the wheel axles and their corresponding components from the kit. Carefully insert the axles into the designated holes on the base structure, ensuring they fit snugly. Secure the wheels to the axles using the provided clips or adhesive, following the instructions for proper alignment. Once the wheels are in place, gently test the mobility to ensure smooth rotation. Next, attach any additional moving parts, such as Minnie’s iconic bow or flower details, using the supplied connectors. Make sure these elements are securely fastened but still allow for the intended movement. Double-check the assembly to confirm all parts are aligned correctly and functioning as designed. This step is crucial for achieving the desired aesthetic and functionality of the final piece.

Adding Flower Power Details

Bring Minnie’s floral charm to life by carefully attaching the flower-themed components. Begin by sorting and preparing the flower petals, stems, and centerpieces from the kit. Using the provided adhesive or connectors, gently secure the largest flower elements to the designated areas on the main structure. Ensure proper alignment and spacing for a balanced look. For intricate details, use tweezers to handle small petals and attach them to the centers of the flowers. Follow the step-by-step guide to position each bloom accurately, creating a vibrant and cohesive design. Once all flowers are in place, add any additional embellishments, such as leaves or decorative accents, to complete the look. Double-check the instructions to ensure all floral details are securely fastened and properly aligned for a polished finish.

Final Touches and Quality Check

Once the main structure and floral details are in place, it’s time for the finishing touches. Inspect the entire model to ensure all components are securely attached and properly aligned. Gently tighten any loose connections or reattach any parts that may have shifted during assembly. Use a soft-bristle brush to remove any dust or debris from the surface. Verify that all moving parts, such as wheels or joints, function smoothly. For a polished look, apply a light coat of protective sealant if recommended. Finally, conduct a thorough quality check to ensure the model meets the expected standards. Once satisfied, your Minnie Mouse Flower Power 4×4 is ready to be displayed or gifted, showcasing your attention to detail and craftsmanship.

Tips for Troubleshooting Common Issues

When assembling the Minnie Mouse Flower Power 4×4, common issues may arise, such as misaligned parts or loose connections. To address these, start by double-checking the instructions and ensuring all pieces are accounted for. If a part doesn’t fit, verify its orientation or consider if it was placed incorrectly earlier. For loose joints, gently tighten screws without over-tightening, which could damage the material. If floral details seem uneven, adjust them carefully to maintain balance. Cosmetic imperfections can often be corrected with a soft-bristle brush or a small cloth. Patience and attention to detail are key. If issues persist, consult online resources or community forums for additional guidance. Troubleshooting with a systematic approach ensures a smooth and enjoyable assembly process.

Maintenance and Storage Recommendations

To keep your Minnie Mouse Flower Power 4×4 model in pristine condition, regular maintenance is essential. Dust the model gently with a soft-bristle brush or cloth to prevent dirt buildup. Avoid exposing it to direct sunlight for extended periods, as this may cause colors to fade. Store the assembled model in a cool, dry place, away from moisture. If disassembling, keep all parts in labeled compartments to avoid losing pieces. Use the original packaging or a sturdy storage box for protection. For long-term storage, ensure the model is secure and not prone to shifting. Avoid harsh chemicals or abrasive cleaners, as they may damage the materials. By following these tips, you can preserve the model’s quality and enjoy it for years to come. Proper care ensures your Minnie Mouse Flower Power 4×4 remains a delightful display piece.

Building the Minnie Mouse Flower Power 4×4 is a rewarding project that combines creativity and precision. With 2925 pieces, this set offers a detailed and engaging assembly experience perfect for Disney fans and hobbyists alike. By following the step-by-step instructions, builders can bring Minnie’s floral-inspired design to life. The completed model is not only visually charming but also a testament to the builder’s skill and patience. For those looking to expand their creative horizons, this project serves as a delightful introduction to larger-scale assemblies. Once completed, it makes a wonderful display piece, celebrating Minnie Mouse’s timeless appeal. Proper care and storage ensure the model remains a cherished keepsake for years to come.


mixels compax instructions

Category : Instructions

Compax, part of the LEGO Mixels Series 9, belongs to the Trashoz tribe. Designed as a trash-compacting Mixel, he resembles a garbage truck. His instructions are available online for fans to build and enjoy.

Overview of the Mixels Series

The LEGO Mixels series features small, colorful creatures from various tribes, each with unique abilities. They can mix or murp to create new characters. The series includes collectible sets, an animated show, and interactive games, making it a versatile and engaging franchise for fans of all ages.

Who is Compax?

Compax is a member of the Trashoz tribe in the LEGO Mixels series. Designed as a trash-compacting Mixel, he resembles a garbage truck with a green color scheme. His role involves cleaning and compacting trash, making him a functional and unique character within the Trashoz group.

Importance of Instructions for Building Compax

Following the instructions ensures a smooth and accurate assembly of Compax. The guide provides step-by-step clarity, helping builders of all skill levels. It highlights proper piece placement and technique, minimizing errors and enhancing the overall building experience. Instructions are available online, making it easy to access and follow along.

Key Features of the Compax Set

Compax features a trash-compacting design with a green color scheme, unique pieces like sharp teeth, and a movable compactor arm, making it a standout Mixel figure.

Design and Color Scheme

Compax features a primarily green color scheme, resembling a trash compactor. His design includes sharp teeth and a movable compactor arm, making him a unique figure in the LEGO Mixels series.

Unique Pieces and Components

Compax stands out with its trash-compacting design, featuring a movable compactor arm and sharp teeth. The set includes specialized LEGO pieces, such as angled plates and joint elements, which enhance its functionality and unique appearance as a Mixel from the Trashoz tribe.

Special Features of the Compax Model

Compax’s design mimics a trash compactor, complete with a movable arm and sharp teeth details. Its unique green color scheme and robust build make it a standout piece. The model also features interchangeable parts, allowing for creative mixing with other Mixels, enhancing its playability and collectibility.

Step-by-Step Building Instructions

Official LEGO instructions for Compax guide builders through assembling the 66-piece model. Step-by-step diagrams ensure clarity, from basic structures to intricate details, helping fans bring this Mixel to life accurately.

Preparing the Pieces and Tools

Begin by sorting pieces by color and type, ensuring all 66 components are accounted for. Use a clean workspace and basic LEGO tools like Allen keys for axle parts. Double-check for missing items and refer to the guide for specific preparation steps before assembly begins.

Building the Lower Body and Wheels

Start by constructing the base using flat plates and axle pieces. Attach the wheels securely, ensuring proper alignment. Add supports and details to the lower frame, following the guide to create a sturdy foundation for Compax’s trash-compacting design, essential for stability and functionality.

Constructing the Upper Body and Accessories

Attach the upper body panels to the lower frame, ensuring alignment. Add details like the trash compactor mechanism and accessory tools. Use specialized pieces for the arms and head, securing them firmly. Follow the guide to integrate moving parts, enhancing Compax’s functionality and completing his iconic trash-handling design.

Final Assembly and Details

Combine the upper and lower sections, ensuring proper alignment. Add final details like the trash compactor arm and decorative elements. Secure all parts firmly, and double-check for accuracy. Your Compax is now complete, ready to join the Trashoz tribe and showcase its unique trash-handling abilities.

Tips and Tricks for Building Compax

Sort pieces by color and type to streamline assembly. Use a clean workspace to avoid losing small parts. Follow instructions step-by-step for accuracy and a seamless build experience.

Organizing Pieces for Efficiency

Sort pieces by color, type, and size to streamline assembly. Use separate containers or bags for small parts like studs and joints. Refer to the instruction manual for guidance on grouping components. A clean, organized workspace helps prevent losing small pieces and ensures a smoother building process. Pro tip: designate a specific area for spare parts to maintain clarity.

Handling Complex Parts and Joints

Complex parts and joints in Compax require patience and precision. Use the LEGO manual’s visual guides to align pieces correctly. Start with larger components, then integrate smaller, intricate parts. For hinges or ball joints, ensure proper alignment before securing. Test mobility in joints during assembly to avoid forcing pieces together, which may cause damage or misalignment.

Alternative Builds and Customizations

Explore alternative builds using Compax’s pieces to create unique Mixel designs. Mix with other Trashoz members for exciting combinations. Customize by swapping parts or adding accessories. Online communities offer inspiration for creative modifications. Experiment with leftover pieces to craft one-of-a-kind Mixel hybrids, expanding play possibilities beyond the original design;

Where to Find Official Instructions

Official LEGO Mixels Compax instructions are available on the LEGO website. Additional guides can be found on online marketplaces like Amazon and through community-generated tutorials online.

LEGO Website and Resources

The LEGO website is the primary source for official Compax instructions, offering exclusive building guides, games, and support. It features detailed, downloadable PDFs for the Compax set, ensuring fans can build accurately. Regular updates and interactive tools make it a comprehensive resource for LEGO enthusiasts and collectors alike.

Online Marketplaces and Retailers

Online marketplaces like Amazon and eBay offer LEGO Mixels Compax sets and instructions. These platforms provide convenient access to both physical sets and digital building guides. Many retailers include customer reviews and detailed descriptions, ensuring buyers can make informed purchases and successfully build their Compax model with ease.

Community-Generated Guides and Tutorials

Fans and enthusiasts often share their own guides and tutorials for building Compax online. These community-created resources include step-by-step photos, video tutorials, and tips for handling complex parts. Platforms like YouTube, LEGO forums, and social media groups offer valuable insights and alternative building strategies for Mixels enthusiasts.

Troubleshooting Common Issues

Common issues include missing pieces, misaligned parts, and assembly errors. Refer to instructions or online guides for solutions. Double-checking steps and using replacement parts can resolve most problems efficiently.

Missing or Damaged Pieces

If pieces are missing or damaged, contact LEGO customer support for replacements. Alternatively, check online marketplaces for spare parts or refer to community guides for substitute solutions. Ensure all pieces are accounted for before starting assembly to avoid delays or incomplete builds.

Difficult-to-Align Parts

Some parts may require precise alignment during assembly. Use the visual guides in the instructions to ensure proper fitting. If pieces don’t align, gently adjust angles or check for correct orientation. Patience and careful referencing of the manual or online tutorials can help resolve alignment issues effectively.

Correcting Mistakes During Assembly

If errors occur, disassemble the affected area carefully. Refer to the instructions or online guides for step-by-step corrections. Double-check each part’s placement and orientation. Patience and attention to detail ensure accuracy and a successful build of your LEGO Mixels Compax model.

Legacy and Popularity of Compax

Compax, a standout in the Trashoz tribe, has gained popularity for its unique trash-compacting design. Its availability in Series 9 and detailed instructions have made it a fan favorite and sought-after collectible.

Impact on the Mixels Franchise

Compax added diversity to the Mixels lineup with its unique trash-compacting theme. Its detailed design and Series 9 release boosted the franchise’s popularity, making it a fan favorite among LEGO enthusiasts and collectors seeking creative builds.

Collector Value and Rarity

Compax, with its unique design and 66-piece structure, holds moderate collector value. As part of Series 9, it remains sought after by Mixels enthusiasts. Its availability and detailed instructions contribute to its appeal, making it a worthwhile addition for LEGO collectors and fans of the Trashoz tribe.

Fan Reception and Reviews

Compax has received positive reviews for its unique trash-compacting design and detailed build. Fans praise its quirky appearance and playability. However, some find the instructions complex for younger builders. Overall, it remains a beloved figure among Mixels enthusiasts and LEGO collectors alike, offering both fun and creativity.

Creative Mixing with Other Mixels

Compax can mix with other Mixels to create unique builds, sparking creativity and fun. This feature is a hallmark of the series, encouraging imaginative play and combinations.

Understanding the Mixing Mechanic

The mixing mechanic allows two Mixels to combine, creating a new model with unique features. This process, central to gameplay, enhances creativity and problem-solving skills, making it a standout feature of the series.

Popular Mixes Involving Compax

Compax frequently mixes with Sweepz to create the Sweepstakes, a unique model combining trash-compacting and street-cleaning abilities. Other mixes, like with Grippit, showcase creative builds, blending functionality and fun, enhancing gameplay and imaginative possibilities for fans.

Creating Unique Mixel Combinations

Compax’s interchangeable parts encourage creativity, allowing fans to craft one-of-a-kind Mixel hybrids. By mixing with other tribes, builders can experiment with unique designs, blending functionality and aesthetics. Official guides and online resources offer inspiration, while personal creativity knows no bounds in this imaginative LEGO universe.

Comparing Compax to Other Trashoz Members

Compax stands out among Trashoz for his junk truck design and unique green color scheme. His specialized tools and compacting features make him a standout in the tribe.

Similarities and Differences with Other Figures

Compax shares the Trashoz tribe’s green color scheme but differs with his unique junk truck design. Unlike Sweepz, Compax features a trash compactor build, making him distinct among Mixels figures with specialized tools for waste management.

Unique Traits of Compax

Compax stands out with his junk truck-inspired design and trash-compacting functionality. His green and yellow color scheme, sharp teeth, and compacting mechanism make him a distinctive Mixel. His ability to compress trash adds a unique feature, setting him apart from other Trashoz members.

Role in the Trashoz Tribe

Compax serves as the Trashoz tribe’s primary waste manager, specializing in trash collection and compaction. His design as a junk truck reflects his role in maintaining cleanliness, making him an essential member of the tribe, focused on efficient waste management and organization.

Building Compax is a rewarding experience, combining creativity with precision. Following the instructions ensures a fun and successful assembly, bringing this unique Mixel to life.

Final Thoughts on Building Compax

Building Compax is a satisfying and creative experience, offering a unique blend of trash-compacting functionality and vibrant design. The process is straightforward, with some parts requiring careful attention. The finished model showcases a mix of practicality and charm, making it a standout piece for display and a great learning tool for understanding gear mechanisms and mechanical designs.

Encouragement for Further Exploration

After completing Compax, explore more Mixels models and their unique mixing abilities. Visit the LEGO website or community guides for inspiration and tips. Experiment with creative builds and mixes to unlock endless possibilities, fostering imagination and skill development through LEGO construction.

Importance of Following Instructions

Following instructions ensures accurate assembly of Compax, preventing errors and maintaining the model’s integrity. Properly aligned pieces guarantee stability and functionality. Instructions guide through complex steps, making the building process enjoyable and frustration-free. They are essential for achieving the desired result and maximizing the LEGO experience.